Keep water out, control humidity, seal gaps, ventilate, maintain drainage, and monitor regularly.
Moisture damage prevention is not guesswork. It is a set of simple habits and smart fixes that keep water where it belongs. I’ve spent years helping homeowners and small businesses fight leaks, mold, and warped floors. In this guide, I share proven steps for moisture damage prevention that you can use today, plus tips, tools, and real stories that show what works.
Understanding the science behind moisture damage prevention
Water moves three ways: liquid leaks, air leaks with water vapor, and vapor diffusion. Warm air holds more moisture than cold air. When warm, moist air hits a cold surface, it can reach the dew point and condense. That is the start of mold and rot.
Aim for indoor relative humidity between 30% and 50%. Keep surfaces warm and dry. Stop air leaks that carry vapor into walls and attics. This science is the backbone of moisture damage prevention.
Key ideas made simple:
- Liquid water is fast damage. Leaks and floods cause bulk wetting.
- Air leaks move lots of water vapor. Seal gaps to slow that flow.
- Vapor diffusion is slow. Use the right vapor retarder in the right place.
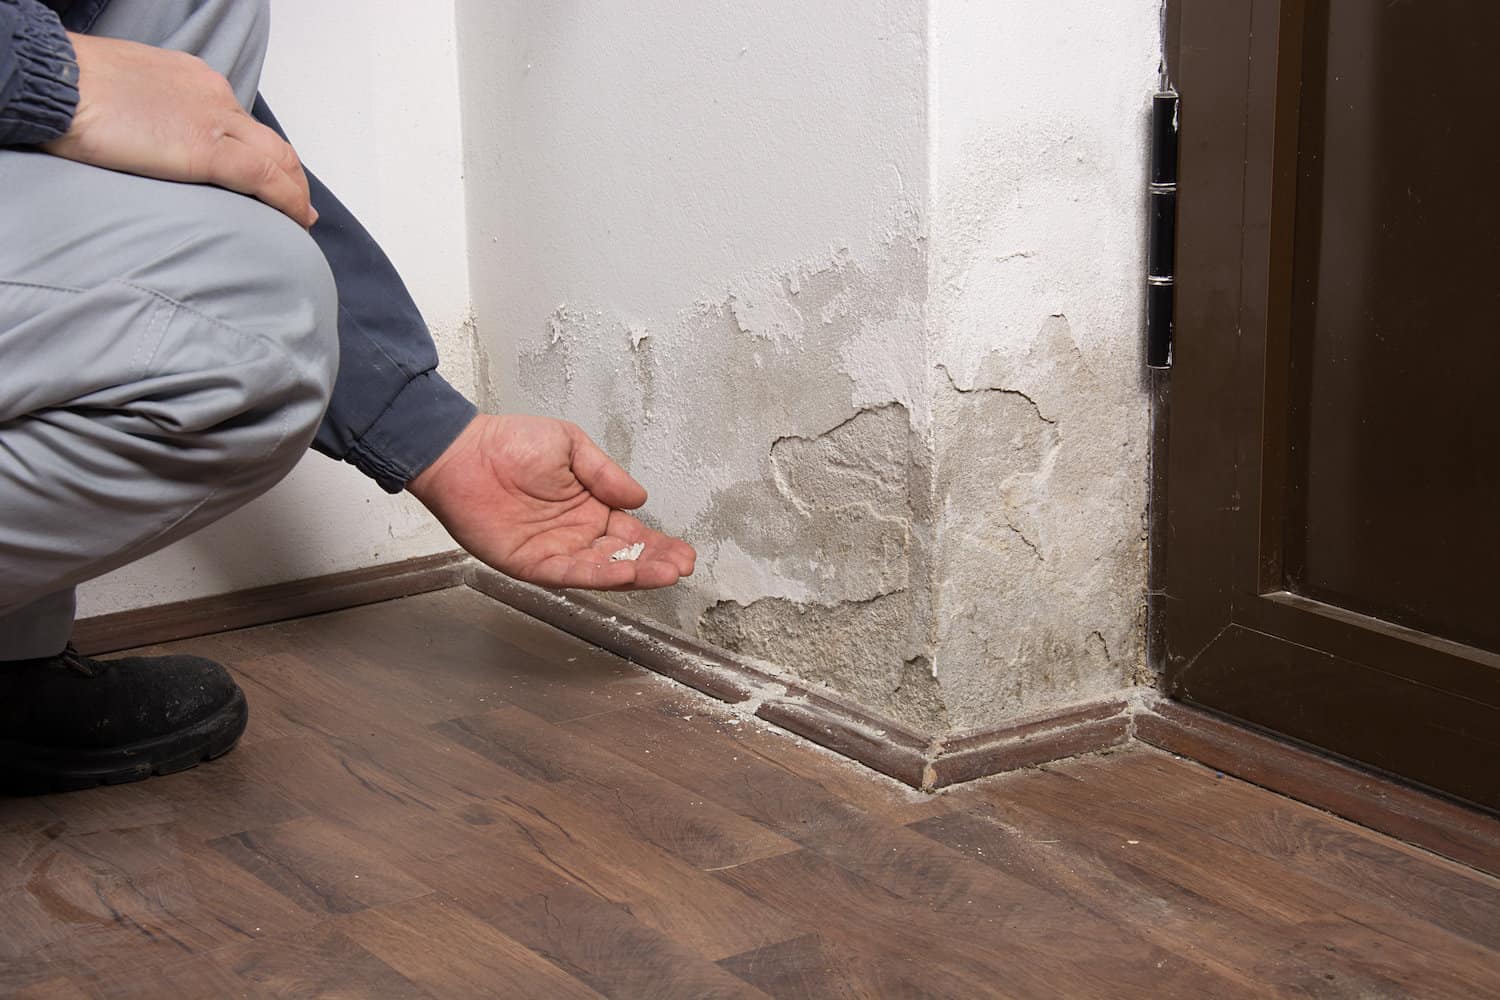
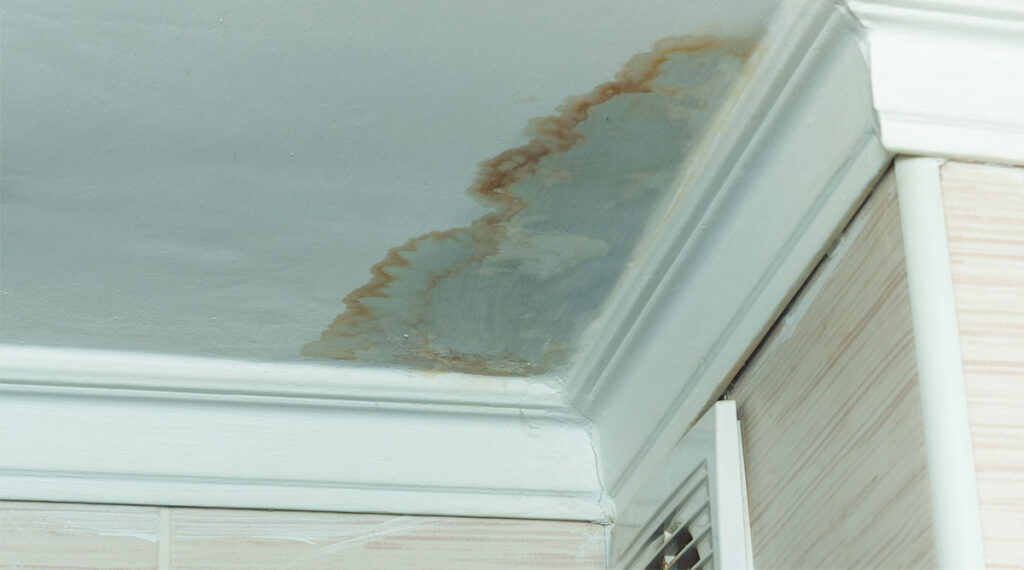
Early signs and routine checks for moisture damage prevention
Catch issues early. That is the cheapest form of moisture damage prevention. Use your nose and eyes every month. A five-minute walk-through can save you thousands.
Look for:
- Musty smells in closets, basements, or crawl spaces.
- Stains on ceilings or around windows and vents.
- Peeling paint, soft drywall, or warped floors.
- Efflorescence on foundation walls. White, powdery salts mean moisture.
- Condensation on windows or pipes.
- Rust on nails, hinges, or HVAC parts.
Do a seasonal check:
- Spring: Roof, gutters, downspouts, and grading.
- Summer: Attic vents, bathroom fans, and dehumidifiers.
- Fall: Flashing, sealants, and window caulk.
- Winter: Ice dams risk, indoor humidity, and cold spots with IR thermometer.
Exterior defenses: drainage and roofing for moisture damage prevention
The best moisture damage prevention starts outside. Move water away from your home fast. Keep the roof and walls dry.
Do these steps:
- Grade soil to slope away from the foundation. Six inches in ten feet is a good goal.
- Clean gutters each season. Extend downspouts at least six feet from the house.
- Add splash blocks or a drain line if water pools by the wall.
- Inspect roof shingles, flashing, and boots around vents. Replace cracked parts at once.
- Keep siding 6–8 inches above soil. Do not let mulch touch wood.
- Seal penetrations where pipes and cables enter. Use exterior-grade sealant.
- Consider a French drain or a sump pump in wet yards.
My field tip: After a storm, walk the site. Watch how water flows. Fix the path, not just the puddle. That habit is core to moisture damage prevention.
Interior controls: ventilation, heating, and dehumidification for moisture damage prevention
Inside, you control humidity, temperature, and airflow. This is daily moisture damage prevention you can do with simple tools.
Targets and habits:
- Keep indoor RH at 30% to 50%. Use a plug-in hygrometer in each floor.
- Run bath and kitchen exhaust fans during and 20 minutes after use.
- Vent fans to the outside, never the attic.
- Use a dehumidifier in basements, laundry areas, or tight homes.
- Seal duct leaks with mastic. Leaky ducts pull damp air from crawl spaces.
- Keep steady heat in winter to avoid cold surfaces that cause condensation.
If you have a tight home, consider an HRV or ERV. These bring in fresh air but control moisture. Balanced ventilation is strong moisture damage prevention.
Room-by-room moisture damage prevention
Target the wet spots first. Small changes add up fast.
Bathrooms
- Squeegee shower walls after use.
- Run the fan for 20 minutes after showers.
- Seal grout and caulk joints. Fix gaps at once.
Kitchen
- Use the range hood for boiling and frying.
- Check the dishwasher and sink trap for drips.
- Pull the fridge yearly. Clean the drip pan and vacuum coils.
Laundry
- Vent the dryer outside with a rigid duct.
- Fix kinks and clean lint. Lint plus moisture feeds mold.
- Spread out laundry days to cut peak humidity spikes.
- Run a dehumidifier with a hose to a drain.
- Insulate cold pipes to stop sweat.
- Use rigid foam on concrete walls, not fiberglass batts.
Attic
- Keep soffit vents clear. Do not block with insulation.
- Air seal ceiling penetrations before adding insulation.
- Watch for dark stains on sheathing. That warns of high moisture.
Crawl space
- Install a ground vapor barrier. Seal seams and tape edges.
- Close soil vents in humid climates and use a dehumidifier.
- Insulate the crawl space walls, not the floor above, when you encapsulate.
Garage
- Add a door sweep to block wind-driven rain.
- Keep wet snow gear on trays. Drain or dry fast.
Each of these steps is small. Together they form strong moisture damage prevention.
Materials and products that help moisture damage prevention
Your material choices matter. Pick products that fight water and mold.
Smart picks:
- Mold-resistant drywall or cement board in wet zones.
- Waterproof membranes in showers and around tubs.
- Closed-cell spray foam in rim joists to block air and vapor.
- Treated lumber where wood can get damp.
- High-quality exterior caulk and paint where sun and rain hit.
- Permeable interior paints so walls can dry to the room.
About vapor control:
- In cold climates, place a smart vapor retarder on the interior side of walls.
- In hot, humid climates, focus on air sealing and exterior water control.
- Let assemblies dry one way. Do not trap moisture between two tight layers.
These choices make moisture damage prevention easier for years to come.

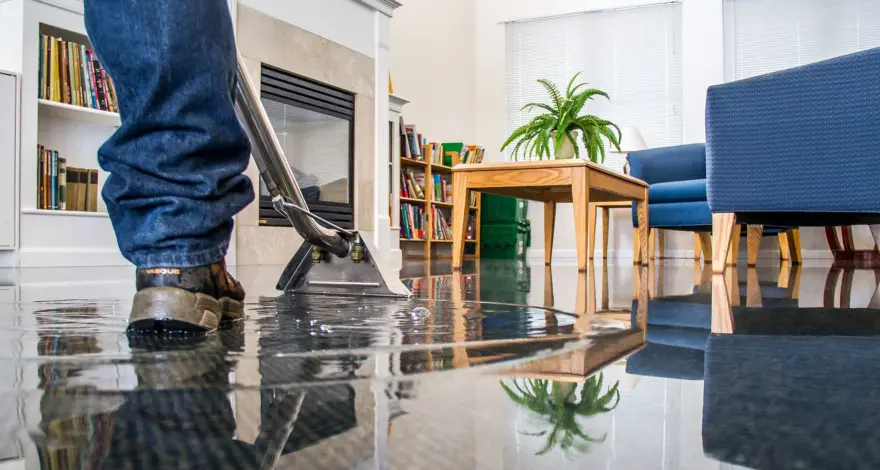
After a leak or flood: emergency moisture damage prevention steps
Time is the key. You have 24–48 hours to dry wet materials before mold grows. Act fast and keep it simple.
Do this now:
- Stop the water. Shut off the valve or patch the leak.
- Remove standing water with a wet vac or pump.
- Pull wet rugs, baseboards, and furniture. Promote airflow.
- Run fans and a dehumidifier on high. Close windows in humid weather.
- Cut out soaked drywall and insulation if they sat wet for more than a day.
- Clean hard surfaces with a mild detergent. Dry again.
For larger events, call a pro with moisture meters and thermal cameras. This is urgent moisture damage prevention. It limits mold, costs, and stress.
Smart monitoring and maintenance schedule for moisture damage prevention
You cannot fix what you do not track. Use simple tech to stay ahead.
Tools that help:
- Hygrometers in basements, baths, and bedrooms.
- Smart leak sensors near the water heater, sinks, fridge, and laundry.
- A whole-home water shutoff valve that closes on leaks.
- An infrared thermometer to find cold, damp spots.
Make a calendar:
- Monthly: Check under sinks and around toilets.
- Quarterly: Clean fans and test GFCI outlets near water.
- Twice a year: Clear gutters, inspect roof, re-caulk seams.
- Yearly: Service HVAC, test the sump pump, and inspect the attic.
This routine adds a safety net to your moisture damage prevention plan.

Costs, ROI, and insurance: the business side of moisture damage prevention
Moisture issues are costly if you wait. A $15 tube of caulk or a $25 gutter fix can avoid a $5,000 repair. That is real return on investment.
Smart spends:
- Hygrometer: low cost, big insight.
- Leak sensors: low cost, high peace of mind.
- Downspout extensions and grading: low to mid cost, big impact.
- Dehumidifier: mid cost, big benefit in basements.
- Roof repairs and flashing: mid to high cost, high risk reduction.
Document all work with photos and dates. If you ever need to file a claim, your records show due care. That proof supports the value of your moisture damage prevention steps.
Real-world lessons from the field
A client had cupped hardwood near a patio door. The cause was not the door. It was a clogged downspout that dumped water at the sill. We extended the spout and re-sealed the threshold. The floor dried and stayed flat. Simple moisture damage prevention saved a pricey floor.
In my own home, a hidden dishwasher drip went on for weeks. A $30 leak sensor beeped one night and caught it. The fix was a $2 O-ring and new braided line. Small tools make strong moisture damage prevention.
Another case: attic mold in a new build. The bath fan vented into the attic. We vented it outside, sealed ceiling gaps, and added baffles at soffits. The sheathing dried. No costly tear-out needed.
Frequently Asked Questions of moisture damage prevention
What indoor humidity should I aim for?
Keep it between 30% and 50%. Use a hygrometer in key rooms to track daily changes.
How often should I clean gutters?
At least twice a year, and after big storms. Clogged gutters cause overflows that soak walls and basements.
Do dehumidifiers use a lot of energy?
Modern units are efficient when sized right. The energy cost is often less than the cost of mold and repairs.
Can I paint over mold to fix it?
No. Paint traps moisture and mold can come back. Clean, dry, and remove damaged material first.
What is the fastest way to dry a wet room?
Stop the water, remove wet items, run fans and a dehumidifier, and keep doors open. Cut out soaked drywall if it stayed wet over a day.
How do I know if I need a vapor retarder?
It depends on your climate and wall build. In cold zones, a smart interior retarder helps; in hot, humid zones, focus on air sealing and exterior water control.
Are bathroom exhaust fans worth it?
Yes. They remove steam fast and cut mold risk. Run during showers and for 20 minutes after.
Conclusion
Moisture is sneaky, but you can beat it with simple habits and smart fixes. Control humidity, move water away from the home, seal air leaks, and watch for early signs. Make a short checklist and follow it each season.
Pick one action today. Clean the gutters, add a leak sensor, or run the bath fan longer. Small steps stack into strong moisture damage prevention. Want more practical tips? Subscribe for updates, ask a question, or share your own wins in the comments.