Keep water out, limit vapor, and dry fast to stop mold and damage.
If you are planning a remodel, you need a clear plan for moisture control during home renovation. I have led many projects where a small leak or slow drying cost weeks and thousands. In this guide, I share proven steps, simple checks, and real lessons so you can master moisture control during home renovation with confidence.

Why moisture control during home renovation matters
Moisture is sneaky. It hides in walls, under floors, and behind trim. It can warp wood, feed mold, and weaken glue and finishes. During a remodel, the building is open, which makes risks higher.
I have seen fresh paint bubble in one week due to a small vapor trap. I have also seen a new floor cup because the slab was still wet. Good moisture control during home renovation is not a bonus. It is a core part of quality, health, and warranty.
Key reasons to focus on it:
- Protect structure: Wood, drywall, and OSB fail fast when wet.
- Protect health: Mold and dust harm indoor air quality.
- Protect budget: Rework is costly and kills schedules.
Moisture control during home renovation is about three things: keep water out, manage vapor, and help parts dry.

Where moisture comes from in a house
Water sneaks in four main ways. Know these and you can block most problems.
- Bulk water: Rain, leaks, floods, and spills.
- Air leaks: Warm, moist air moves through gaps and condenses on cold parts.
- Vapor diffusion: Water vapor moves through materials based on pressure and perm rating.
- Capillary action: Water wicks through concrete, mortar, and wood fibers.
Daily life adds more:
- Showers, cooking, plants, and unvented dryers.
- New concrete, paint, and drywall mud that must cure and off‑gas moisture.
- Weather swings during construction.
When you plan moisture control during home renovation, you must assess each source and decide how to block or vent it.

Pre-renovation moisture audit and testing
Start with a simple audit before you demo. You want a baseline. You also want to spot hidden wet spots.
Use these steps:
- Walk the site on a rainy day if you can. Look for stains and musty smells.
- Probe wood with a moisture meter. Check sills, rim joists, and subfloors.
- Scan with an infrared camera. Cold, damp areas often show up as cool spots.
- Tape test for condensation. Seal clear plastic on suspect walls and see if water forms.
- Check exterior grading and gutters. Poor drainage causes many “indoor” problems.
Data I rely on:
- Wood under 15 percent MC is a good target before closing walls.
- Cement slabs often need under 75 percent RH for many floors. Always confirm product specs.
A tight audit saves time. It sets the plan for moisture control during home renovation and helps you pick the right fixes.
Plan the right materials and assemblies
The wrong layer in the wrong place traps water. The right one lets parts dry if they ever get wet.
Simple rules that work:
- Drainage plane outside: Use a quality weather barrier and solid flashing details.
- Capillary breaks: Sill gaskets, foam under plates, and vapor barriers under slabs.
- Smart vapor control: Use a variable vapor retarder on the warm side in cold zones.
- Right backer boards: Use cement board or fiber cement in wet zones, not paper-faced drywall.
- Solid sealants and tapes: Use products that stick to your exact substrate and temp range.
Pick materials by climate and assembly:
- Hot-humid zones need outward drying and fast venting.
- Cold zones need warm-side vapor control and air tightness.
- Mixed zones need “smart” layers that adapt.
Tie each choice to moisture control during home renovation. Note the perm ratings, cure times, and install limits for every product.

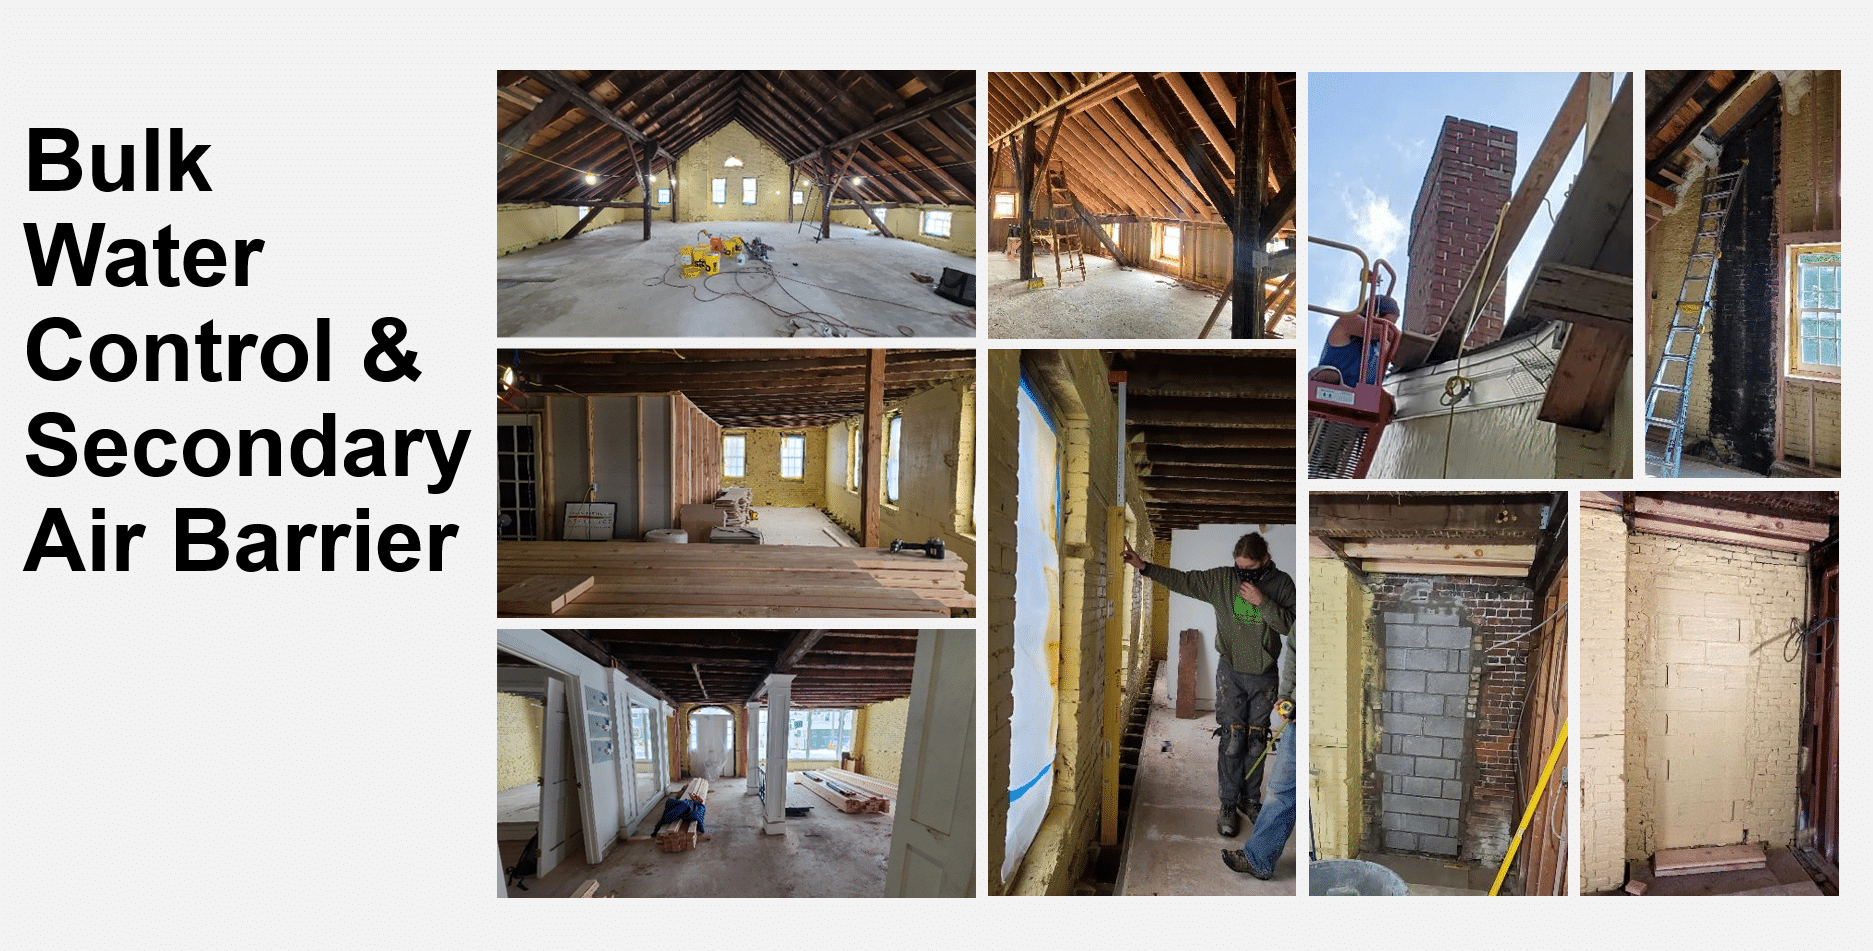
Control moisture during construction
Most failures start during the build. Plan moisture control during home renovation into your schedule.
Do this as a standard:
- Dry-in first. Roof, flashing, and housewrap before interior finishes.
- Cover materials. Keep wood and drywall off the ground and under tarps.
- Sequence wet work. Pour slabs and mud early. Allow real cure time.
- Vent and dehumidify. Use a dehumidifier and fans when RH is high.
- Test and verify. Log RH and temperature daily in humid months.
Targets that keep you safe:
- Indoor RH between 35 and 55 percent during finish work.
- Subfloor MC matched to flooring specs before install.
- Paint and adhesives only within their humidity and temperature limits.
When storms hit a project of mine, we used temporary poly walls and a desiccant dehumidifier. That one move kept cabinets from swelling and saved the dates.
Bath and kitchen upgrades that stay dry
These rooms see the most water. Small details make big wins.
Bath tips I trust:
- Use a continuous waterproofing membrane in showers. Tie it into the drain and curb.
- Slope shower floors and bench tops to the drain.
- Vent fans to the outside. Size at least 1 CFM per square foot or per code. Use timers.
Kitchen tips that pay off:
- Add shutoff valves and stainless braided hoses.
- Flash and seal windows and backsplashes at sinks.
- Install a pan under the dishwasher, if allowed, with a leak sensor.
Add these to your plan for moisture control during home renovation. It keeps steam and splashes from becoming repairs.

Basements and crawl spaces that resist damp
Below grade areas are often the main source of moisture.
- Manage water outside first. Grade soil away, extend downspouts, and fix cracks.
- Use interior drains and a sump pump if needed. Keep the lid sealed.
- Insulate and air seal rim joists. Use foam or approved methods to stop condensation.
Crawl space steps:
- Lay a thick vapor barrier on the soil. Seal seams and edges up the wall.
- Close vents in hot-humid areas and use controlled dehumidification.
- Keep wood clear of the soil and check for plumbing leaks.
Moisture control during home renovation in these spaces pays back across the whole house. It helps the HVAC, floors, and air quality upstairs.

Drying, commissioning, and long term checks
Before you close walls or lay floors, stop and test. This is your safety net.
What to verify:
- Wood subfloors in range for the finish floor.
- Drywall mud and paint cured per label.
- Concrete surface and in-slab RH meet the floor maker’s specs.
Commissioning steps:
- Run the HVAC and balance airflow.
- Set the home to 40 to 50 percent RH if possible.
- Use data loggers for two weeks after move-in.
These checks lock in your work. They complete moisture control during home renovation and reduce warranty calls.

Budget, schedule, and ROI of moisture control
Yes, this level of care has a cost. But the return is strong.
Typical costs:
- Weather barriers, tapes, and sealants: modest but vital.
- Dehumidifiers and temp heat: short-term rental cost.
- Extra labor for flashing, membranes, and tests: planned hours.
Typical savings:
- Avoid floor failures, which are very costly.
- Avoid mold cleanup and schedule slips.
- Boost home value with better indoor air quality.
I have seen a $1,500 drying plan save a $20,000 floor. Moisture control during home renovation is one of the best insurance moves you can make.
Mistakes to avoid with moisture control during home renovation
Avoid these common traps. They cause most callbacks.
- Sealing tight without planned ventilation. You need balanced fresh air.
- Putting a vapor barrier on both sides of a wall. That traps moisture.
- Ignoring climate zone rules. Details that work in Maine can fail in Miami.
- Rushing floors over wet slabs. Test, then install.
- Skipping flashings at windows and doors. Water always finds the gap.
Make a short checklist. Review it at each phase of your moisture control during home renovation plan.
Real stories and lessons from the field
On one project, a second-floor bath leaked into a new kitchen. The cause was a missed seal at a shower valve. We added a pressure test step to our checklist. No more repeats.
On another job, a team laid hardwood over a slab at 85 percent RH. It cupped in days. We now use in-slab RH tests and acclimate the wood to the space. This small policy shift made our moisture control during home renovation far more reliable.
Tools, standards, and checklists you can use
A few simple tools make a huge difference.
Tools I trust:
- Pin and pinless moisture meters for wood and drywall.
- In-slab RH test kits for concrete.
- Hygrometers and data loggers for RH and temperature.
- Good fans, HEPA air scrubbers, and dehumidifiers.
Useful standards to guide choices:
- Ventilation rates and bath fan sizing from common codes.
- Flooring and adhesive makers’ moisture limits.
- Building science research on vapor control and air sealing.
Keep a one-page checklist for moisture control during home renovation. Use it at pre-demo, rough-in, pre-close, and pre-move-in.
Frequently Asked Questions of moisture control during home renovation
What humidity level should I aim for during a remodel?
Aim for 35 to 55 percent RH when finishes go in. This range protects floors, paint, and adhesives.
How long should concrete cure before installing flooring?
It depends on mix, thickness, and climate. Always test with in-slab RH kits and meet the floor maker’s limit.
Do I need a vapor barrier or a vapor retarder?
Often you need a smart vapor retarder, not a full barrier. Pick by climate, assembly, and the ability to dry to one side.
Will a dehumidifier be enough to control moisture?
A dehumidifier helps, but it is only part of the plan. You still need air sealing, venting, drainage, and smart materials.
How do I know if my subfloor is dry enough?
Use a moisture meter and compare to the flooring specs. Check in several spots, including edges and around sinks.
Can I install wood flooring over a new slab?
Yes, but only after it meets the required in-slab RH. Use a tested vapor control system if the product calls for it.
What is the biggest moisture risk I might miss?
Air leaks around windows and baths are common. They move moist air into cold spaces and cause hidden condensation.
Conclusion
Moisture is simple to beat when you plan for it. Keep water out, control vapor, and help parts dry. Use tests, vents, and the right layers, and you cut risk, cost, and stress.
Take one step today. Write a short plan for moisture control during home renovation, and share it with your team. If this guide helped, subscribe for more how-tos, ask a question, or share your own field story.