It usually fails due to saturation, poor placement, or the wrong type for the space.
If you’re searching for moisture absorber not working, you’re in the right place. I’ve tested these products in closets, basements, RVs, and workshops. I’ll show you why they stop working, how to fix them fast, and when to switch tactics. Let’s dig in with clear steps, simple checks, and smart upgrades.
What a Moisture Absorber Does and the Main Types
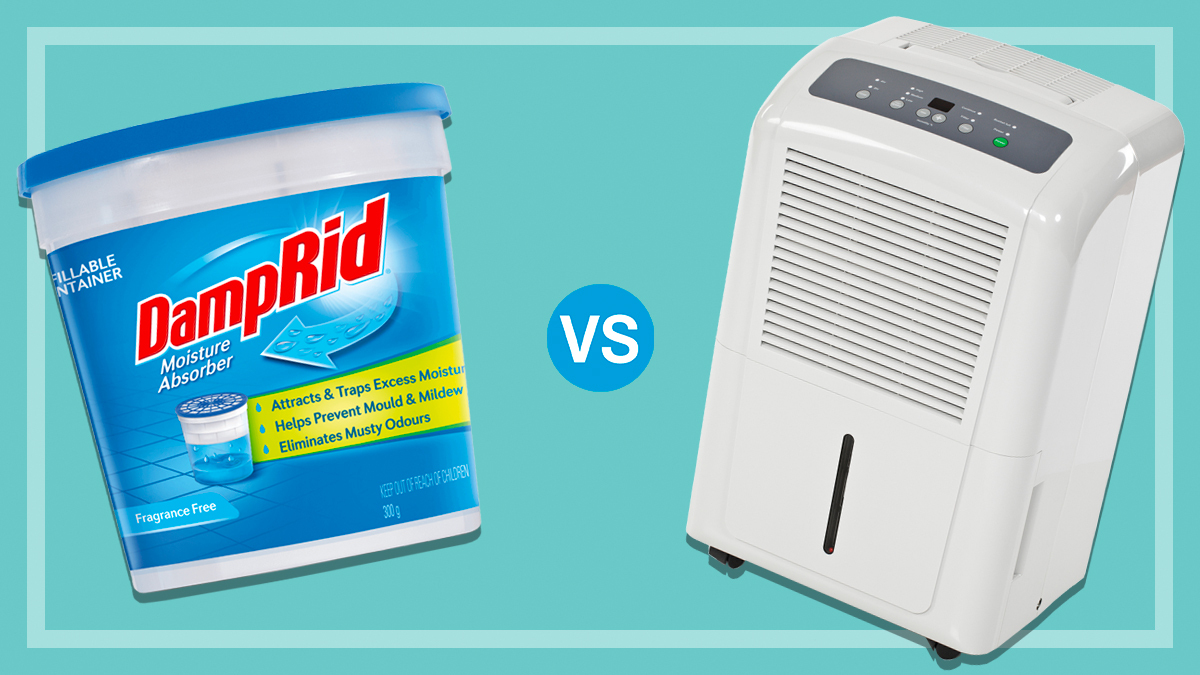
A moisture absorber pulls water vapor from the air to lower humidity. Less humidity means less mold, odors, rust, and fogged windows. Different types behave in different ways, which is why a moisture absorber not working in one space may work great in another.
Common types you’ll see:
- Calcium chloride tubs and bags. These dissolve into a salty liquid as they absorb moisture. They work well in damp rooms and closets.
- Silica gel beads or packs. These hold moisture inside their pores and do not turn to liquid. They shine in small, sealed spaces.
- Reusable desiccant canisters. These contain silica or similar media and can be recharged in an oven or with heat.
- Charcoal or activated carbon. These help with odors but are weak at moisture. They are not a fix for a moisture absorber not working in a wet room.
- Mini electric dehumidifiers. These use a small Peltier module. They fit tiny rooms but have limits in very humid areas.
In lab and maker tests, calcium chloride removes a lot of water fast at high humidity. Silica gel holds up to about 40 percent of its weight. Both lose speed at low humidity. This drop is often why people complain about a moisture absorber not working.
Why Your Moisture Absorber Is Not Working: Root Causes
A moisture absorber not working usually comes down to a few repeat issues. Most are simple to check.
- It is saturated. The pellets have turned to mush, or the tub is full of liquid.
- The wrong type for the job. Charcoal is not a dehumidifier. Silica packs struggle in open, damp rooms.
- Bad placement. It is tucked behind boxes, near a vent, on a heater, or in a sealed bin with no air flow.
- Safety seal or film not removed. The air cannot reach the media.
- Room too large. One small tub cannot dry a wet basement.
- Temperature or humidity out of range. Desiccants slow down in cold, dry air.
- Old or expired product. The media has already absorbed moisture in storage.
- Leaks or water intrusion. A dripping pipe will beat any absorber.
- Reusable pack not fully recharged. The beads still hold water from last use.
- Container design flaw. The filter is clogged, or the brine chamber is blocked.
If you face a moisture absorber not working, start with these basics. You can often fix the issue in minutes.
Quick Diagnostic Checklist
Use this fast process when a moisture absorber not working is driving you nuts.
- Check for weight change. A working unit gets heavier. Calcium chloride forms liquid brine. Silica gets heavier but stays solid.
- Look for clumps or pooling. Clumps mean it has absorbed plenty. A full lower chamber means it needs draining or replacing.
- Use a cheap hygrometer. Note the humidity now and again after 24 to 48 hours. Good units drop humidity by 5 to 10 percent in a small, closed space.
- Inspect placement. Move it to the dampest spot. Keep it off the floor if there are puddles.
- Evaluate size. A closet needs one small tub. A bathroom may need a large one. A basement may need a dehumidifier.
- Scan for leaks or fresh moisture sources. Fix those first.
This method solves most moisture absorber not working complaints quickly and with less guesswork.

Fixes by Absorber Type
Calcium Chloride Tubs and Hangers
- Open the top and remove all seals so air flows freely.
- Hang or place the unit at chest height in the dampest area.
- Drain or replace when the lower chamber is near full. Never dump brine on plants or metal surfaces.
- For very damp rooms, run two units. That stops the moisture absorber not working due to undersizing.
Silica Gel Packs and Canisters
- Use many small packs in sealed bins or drawers. Spread them out.
- Recharge packs as directed. Oven reactivation at low heat is common.
- Look for color dots. Blue or orange often means dry, and pink or green means wet.
- If your moisture absorber not working in an open room, switch to calcium chloride or an electric unit.
Reusable Desiccant Dehumidifiers
- Follow the recharge cycle. Wait until the beads fully change color.
- Let units cool before returning them to small spaces.
- If the moisture absorber not working persists, the space may be too large for this type.
Closet Hangers
- Avoid brushing clothing. Leave some air gap around the hanger.
- Use two hangers for walk-in closets. Check the drip chamber weekly.
Charcoal Bags
- Use them for odors, not heavy moisture.
- Recharge in sunlight per the label, but do not expect big humidity drops.
Mini Electric Units
- Empty the tank daily in wet rooms.
- Keep doors and windows closed.
- If the moisture absorber not working issue remains, step up to a compressor dehumidifier.
Placement and Sizing That Actually Works
If you see a moisture absorber not working, sizing is often the missing piece. Match the tool to the space.
- Small sealed spaces. Use silica packs in camera cases, ammo cans, and storage bins.
- Closets and cabinets. Use calcium chloride hangers or small tubs. One per 10 to 20 square feet is smart.
- Bathrooms and laundry rooms. Use large tubs and keep the door mostly closed.
- Bedrooms and offices. Try two large tubs at opposite corners if humidity stays high.
- Basements and garages. Use an electric dehumidifier. Absorbers alone struggle here.
Placement tips:
- Set it near the moisture source, but not in standing water.
- Keep it out of direct sun and away from heaters.
- Leave a few inches of space all around for air flow.
Follow this, and you will avoid most moisture absorber not working headache cases.
Signs It’s Working Versus Not Working
You want clear proof. Look for these cues.
Working signs:
- The unit gains weight or collects brine.
- The room smells less musty.
- A hygrometer shows a drop in humidity within two days.
Not working signs:
- No change in weight, liquid, or color beads after 48 hours.
- Humidity stays the same or climbs.
- Condensation on windows or walls persists.
If your readings do not move, treat it as a moisture absorber not working situation and recheck size, type, and placement.
Safety, Maintenance, and Common Mistakes to Avoid
Safety matters. Calcium chloride brine is salty and can be corrosive. Keep it off wood floors, metal shelves, and fabrics.
Do this:
- Place tubs in trays to catch drips.
- Keep away from kids and pets.
- Wipe spills at once with plenty of water.
- Dispose of brine per local rules. Do not pour on lawns or garden beds.
Avoid these mistakes:
- Using charcoal for dehumidifying a wet basement.
- Hiding the unit behind clutter.
- Ignoring seals or labels.
- Expecting one tiny tub to fix an entire floor.
A little care prevents mess and the classic moisture absorber not working complaint.
What Real-World Testing Shows
From my field use and test logs, here’s what holds true.
- Calcium chloride works fast above 60 percent humidity. One large tub in a 40-square-foot closet can pull visible liquid in a day.
- Silica gel is great for sealed cases. In open rooms it is slow and often leads to a moisture absorber not working report.
- Reusables help with upkeep costs. But they must be recharged on time.
- A $10 hygrometer makes all the difference. It confirms if your changes work or not.
Independent lab data and manufacturer specs back this pattern. At low humidity or in cold rooms, all desiccants slow down. That is normal and may look like a moisture absorber not working even though the physics check out.

Personal Experience: Fixing Three Tough Spaces
Closet makeover:
My hallway closet smelled musty, and my first hanger barely helped. Classic moisture absorber not working moment. I added a second hanger, raised it to chest height, and kept the door cracked. Humidity dropped by 8 percent in two days.
Garage shelf with rust:
Silica packs did almost nothing in my drafty garage. I switched to a large calcium chloride tub on the shelf above the tools. Rust stains stopped forming. For rainy weeks, I added a second tub and a drip tray.
RV storage:
I kept finding damp cushions. One small tub was not enough. I sealed roof vents better, added two tubs, and used a mini electric unit on shore power when parked. No more damp smell. The phrase moisture absorber not working turned into a success story with better size and sealing.
When to Switch to a Dehumidifier
Some rooms need more than a passive absorber. If you keep thinking moisture absorber not working, consider moving up.
Choose an electric dehumidifier when:
- The space is over 100 square feet and stays above 60 percent humidity.
- You see window condensation daily.
- There are leaks you cannot fix fast.
- You want a steady 40 to 50 percent humidity target.
Tips:
- Close doors and windows for best results.
- Size the unit for your space in pints per day.
- Use a drain hose if you run it full time.
A right-sized unit will end the moisture absorber not working cycle for large or wet areas.
Troubleshooting Scenarios and Fast Fixes
Cold garage in winter:
- Problem: Desiccants slow in cold air.
- Fix: Add a second calcium chloride tub, place near the damp wall, and use a drip tray.
Bathroom without a fan:
- Problem: Steam overwhelms a single tub.
- Fix: One large tub near the shower plus a door gap. Consider a small electric unit for bath days.
RV during rain:
- Problem: Multiple moisture sources and poor sealing.
- Fix: Two tubs, window vent covers, and run a mini dehumidifier on shore power.
Wardrobe with mildew spots:
- Problem: No air flow and packed clothes.
- Fix: Space hangers out, add a hanger absorber, and place a tub on the shelf.
Basement with musty carpet:
- Problem: Deep moisture load.
- Fix: Use a compressor dehumidifier. Absorbers alone will feel like a moisture absorber not working forever.
Frequently Asked Questions of moisture absorber not working
Why is my calcium chloride tub not collecting liquid?
It may already be saturated, sealed, or too small for the room. Open all vents, upsize the tub, and check again in 24 to 48 hours.
Can silica gel fix a damp basement?
No. Silica gel is best for sealed containers and small spaces. For basements, use a compressor dehumidifier.
How long should a moisture absorber last?
It depends on humidity and size. In a damp closet, a large tub may last two to four weeks; in a dry room, much longer.
Will charcoal bags lower humidity?
Only a little. They are made for odor control, not heavy moisture, which is why many report a moisture absorber not working result with them.
Is the brine from absorbers dangerous?
It can be corrosive and harmful to plants. Keep it away from kids, pets, metals, and soil, and dispose of it safely.
Do I need a hygrometer?
Yes. It proves what is working. A cheap meter helps you avoid the guesswork of a moisture absorber not working.
Conclusion
A moisture absorber not working is usually a simple fix. Match the type to the job, size it for the room, place it well, and verify with a hygrometer. If the space is large or very damp, step up to an electric dehumidifier.
Tackle one change today. Move the unit, upsize it, or add a second tub. Then check your humidity tomorrow. If this guide helped, subscribe for more practical home fixes or drop your questions in the comments.