Keep moisture out with steady ventilation, tight seals, heat, and smart daily habits.
If you live small, you already know moisture can feel big. I’ve helped design and tune many tiny houses, and I’ve lived in one through four seasons. In this guide, you’ll get clear, practical steps for moisture control for tiny homes. We will cover science, gear, habits, and fixes that actually work in a small space, so you can breathe easy and protect your home.

Why moisture skyrockets in small spaces
Moisture control for tiny homes starts with understanding the load. A shower, a pot of soup, and two people breathing can spike indoor humidity fast. In a small box, there is little air to mix and buffer that spike. Surfaces cool fast at night, so water condenses on windows and in corners.
Every person adds water to the air. So do pets, plants, gas stoves, and wet gear. Propane space heaters and unvented combustion add water and risk. The rule is simple: cut the source, move wet air out, and keep surfaces warm.

The science in one minute: humidity, vapor drive, and dew point
Moisture control for tiny homes is about where water goes when air cools. Warm air can hold more water. When that air touches a cold surface, it reaches the dew point and drops water. That is why you see foggy windows at dawn.
Water vapor also moves through materials from warm to cold. If wall layers are not planned, vapor can hit cold sheathing and condense. This leads to mold and rot. Good control means warm surfaces, smart vapor layers, and steady air flow.
.jpg)
Find and fix the sources first
Before you buy a dehumidifier, do a moisture audit. Moisture control for tiny homes works best when you remove the big sources.
Do this quick checklist:
- Cooking: Use lids and run a ducted range hood every time you cook.
- Bathing: Take shorter showers and run the bath fan during and 20 minutes after.
- Laundry: Dry clothes outside or vent the dryer outside.
- Plants and aquariums: Keep a few only, and move the rest out.
- Wet gear: Dry boots and coats in a vented spot or outside.
- Combustion: Do not use unvented gas heaters inside.
From my first winter in a tiny home, I learned one thing fast. Wet coats inside raised humidity from 45% to 65% in an hour. Moving a drying rack to a vented porch fixed it.

Ventilation that actually works in a tiny home
Moisture control for tiny homes needs real ventilation. Cracking a window helps, but it is not enough in cold or wet weather. Use a system that gives you steady, known air flow.
Here are solid options:
- Continuous bath fan: Run a quiet fan at 20 to 40 CFM all day. Duct it outside with smooth pipe.
- Ducted range hood: Vent to the outdoors. Use it on low for simmering and high for searing.
- Micro HRV or ERV: These bring in fresh air and recover heat. They cost more but save energy and comfort.
- Boost switches and timers: Add a timer in bath and kitchen. Aim for 20 minutes after moisture events.
- Air paths: Undercut doors or add transfer grilles so air can move to the exhaust point.
A simple rule from building practice helps. Provide at least a gentle, continuous exchange sized to your floor area and people. This keeps humidity stable and removes CO2 and odors too.

Heating, cooling, and dehumidification
Right-sized heating and cooling are key to moisture control for tiny homes. Heat dries air by lowering relative humidity, and cooling removes water on the coil. A small inverter mini split is often ideal. It runs quiet, sips power, and manages both temperature and humidity.
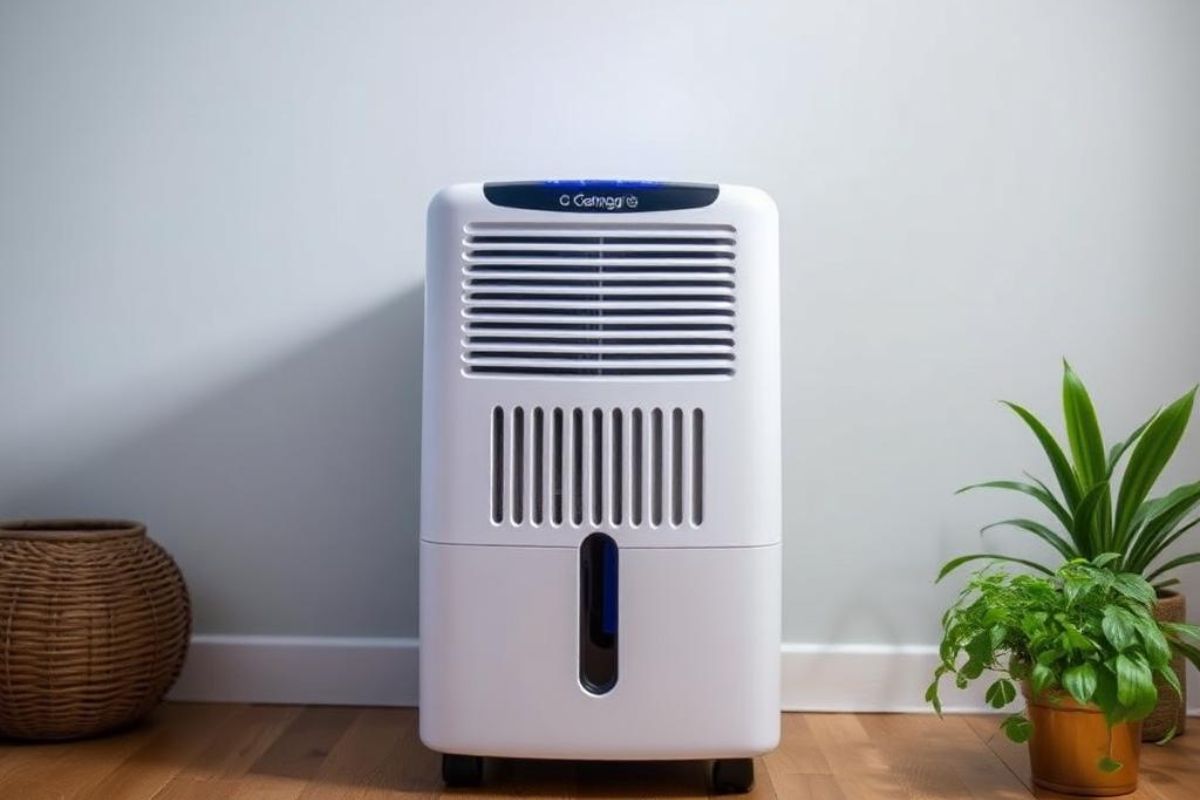
Add a dehumidifier if your climate is wet or if you dry clothes indoors. Pick a unit sized to your square feet and moisture load. Run it to hold 40% to 50% relative humidity. In very cold weather, aim for 30% to 40% to limit window condensation.
Tips that work:
- Place the dehumidifier near the bath or kitchen for quick capture.
- Drain it to a sink or outside so you do not have to empty buckets.
- Use a humidity setpoint, not just On/Off.

Build tight, ventilate right: envelope details that stop hidden moisture
For long-term moisture control for tiny homes, you need a tight shell. Air leaks carry more water than vapor through materials. Seal all joints, outlets, and seams with tapes and gaskets. A blower door test helps you find leaks and set a tightness target.
Plan vapor control by climate:
- Cold climates: Put a smart vapor retarder on the warm side of walls. Keep exterior sheathing warm with exterior insulation if you can.
- Hot-humid climates: Let walls dry inward. Avoid interior polyethylene. Use vapor-open paints and a vented rain screen outside.
Do not skip a rain screen gap behind siding. It vents stray water and keeps walls dry. Treat the floor over a trailer like a roof. Use rigid or closed-cell foam, a tough air-water barrier, and metal flashing to stop road spray.
Water in, water out: plumbing, showers, and daily habits
Daily habits make or break moisture control for tiny homes. Small changes pay off fast. Think of water like glitter. Once it spreads, it is hard to clean up.
Do these easy wins:
- Put lids on pots when cooking and turn the fan on first.
- Use a squeegee on shower walls and floor after each use.
- Keep the bath fan on for 20 minutes with a timer switch.
- Wipe window sills on cold mornings before drops pool.
- Store firewood outside. It is wet and adds a lot of vapor.
Plumbing matters too. Insulate cold water lines to avoid sweating. Fix any drips at once. Even tiny leaks can add pints per day into the air and into cavities.
Measure, monitor, and maintain
What gets measured gets managed. Moisture control for tiny homes is easier with data. Use small hygrometers in the kitchen, bath, and sleeping loft. Pick ones that log data, so you can spot peaks and trends.
Set simple targets:
- Relative humidity: 30% to 50% most of the time.
- Temperature: keep surfaces above the dew point. Warm your loft if you see damp wood.
- CO2: if it rises fast and stays high, boost ventilation.
Make a monthly routine. Clean fan grilles. Check ducts. Inspect window frames and corners for mold. Replace dehumidifier filters so air can flow.

Mold prevention and safe cleanup
Mold needs water, food, and time. Remove water and it cannot grow. For moisture control for tiny homes, speed is your friend. Dry wet spots within 24 to 48 hours.
If you see small patches, clean hard surfaces with detergent and water. Dry well. For porous items like ceiling tiles or soggy rugs, removal is best. Wear gloves and a mask. If growth covers more than a small area, bring in a pro to check for hidden wet layers.
Tiny home moisture strategies by climate
Moisture control for tiny homes is not one-size-fits-all. Tailor your setup to your zone.
Cold-dry
Keep surfaces warm. Add exterior insulation if you can. Use a smart vapor retarder inside. Run a continuous fan and watch winter RH near 30% to 40% to stop window sweat.
Mixed-humid
Use a small mini split with dehumidify mode. Build a vented rain screen outside and pick vapor-open paints inside. Balance bath and kitchen exhaust with a small supply vent or HRV.
Hot-humid
Air seal the shell and run cooling to control indoor RH. Avoid interior polyethylene. Keep showers short and vent hard. Close windows when AC runs to avoid pulling in moist air.
Marine or coastal
Expect cool, damp air most of the year. Use continuous ventilation with heat recovery. Favor moisture-tolerant materials like cement board and fiberglass. Keep a dehumidifier on a drain hose for long, wet seasons.
Budget and upgrade roadmap
You can phase moisture control for tiny homes over time. Start with free habits, then add gear and shell fixes.
Start free:
- Use lids, squeegee the shower, and run fans on timers.
- Dry gear outside and keep plants to a few low-water types.
Low cost:
- Add continuous fan controls and door undercuts.
- Buy two to three hygrometers and move them around.
Mid cost:
- Install a ducted range hood and a quiet bath fan.
- Add a 20 to 35-pint dehumidifier with hose drain.
High impact upgrades:
- Add a micro HRV or ERV for balanced fresh air.
- Improve air sealing and consider exterior insulation.
- Replace single-pane windows with low-e, double-pane units.
When I added a micro HRV to a 220-square-foot build, indoor RH dropped from daily peaks of 65% to steady 45%. Cooking smells cleared faster too. That one upgrade made the home feel bigger.
Frequently Asked Questions of moisture control for tiny homes
How much humidity is ideal in a tiny home?
Aim for 30% to 50% relative humidity. In very cold weather, 30% to 40% helps prevent window condensation.
Do I really need a dehumidifier if I have a mini split?
Maybe. Mini splits remove some moisture, but not always enough in wet seasons. A small dehumidifier helps hold stable RH without overcooling.
Are unvented gas heaters safe for tiny homes?
No. They add water and combustion byproducts into your air. Use vented heaters or a mini split for safe, dry heat.
How long should I run the bath fan after a shower?
Run it during the shower and for 20 minutes after. A timer switch makes this easy and keeps habits consistent.
Will indoor plants cause moisture problems?
A few small plants are fine. Large collections or big planters can raise humidity, so keep them limited or move some outside.
Can window condensation be fixed without replacing windows?
Often yes. Lower indoor RH, improve air flow across glass, and raise surface temperature with good shades or storms. If it persists, upgrade glazing.
How do I know if my ventilation is enough?
Use a simple airflow meter or rely on CO2 and RH trends. If RH spikes and lingers or CO2 stays high, increase continuous airflow.
Conclusion
Moisture control for tiny homes comes down to three things. Reduce sources, move wet air out, and keep surfaces warm. When you measure results and tweak as you go, you win back comfort, health, and longevity for your home.
Start with the free steps today. Add the right fan, a small dehumidifier, and a few envelope upgrades as your budget allows. Want more checklists and gear picks? Subscribe for updates or drop your questions in the comments so I can help you dial in your tiny space.